Installation & licensing of StressCheck and other ESRD products is straightforward. It is recommended that users thoroughly read the below tips and best practices before installing ESRD products, or setting up a floating license server.
Installation & Licensing

Getting Up and Running with ESRD Products
Essentially, there are two steps to running ESRD products:
- Installation of the ESRD product(s) on a local machine or a server machine (registry-free)
- Installation of ESRD-generated FlexNet license keys on a license server (floating) or a local machine (node-locked)
The following tips and best practices ensure these steps are successful for your ESRD product(s).
- You must have Administrator Privileges in order to properly install StressCheck or other ESRD products.
- Download the latest StressCheck (or desired ESRD product) .zip file from the ESRD Resource Library.
Note: you must be have Software Downloader privileges to download ESRD products. If you do not yet have Software Downloader privileges, and are an ESRD Customer or Trial Evaluator, you must Request an ESRD Membership Upgrade.
- Unzip and double-click the .msi to start the installation process.
- Follow the instructions to install the ESRD product. You may choose from Complete, Typical or Custom. Typically a reboot is not required.
- If you have a license file, or a license server is available, jump to tip #4.
There are two methods for StressCheck FlexNet licensing. The first method is the machine HOST ID (Ethernet MAC address), the second method is the Disk ID (Disk Volume Serial Number). Note: for floating licenses, ESRD requires the server name and HOST ID.
If the latest StressCheck FlexNet license manager is already installed, the best way to find machine ID information for StressCheck licensing is to run LMGRD’s LMTools application (lmtools.exe) or the LMAdmin Interface:
- Start LMTools.exe.
- Go to the “System Settings” tab and click “Save HOSTID Info to a File”.
- Save the file to your desktop.
- Open the file and copy the contents into the “Message” field of Request for ESRD Support. Complete the form and Submit.
- Run the LMAdmin Interface.
- Click the Administration tab in the top right.
- If prompted, enter username/password (admin/admin is the default) and click Submit.
- Click the System Information tab on the left.
- Copy the Host Name and Ethernet address and paste the contents into the “Message” field of Request for ESRD Support. Complete the form and submit.
If the StressCheck FlexNet license manager is NOT already installed then the following techniques are recommended:
- Open up a command prompt (cmd.exe).
- Type “ipconfig /all” and hit Enter.
- Locate the “Ethernet adapter Local Area Connection:” line, and then the “Physical Address” subline.
- Copy the 12-digit alphanumeric string into the “Message” field of Request for ESRD Support. Complete the form and Submit.
- Open up a command prompt (cmd.exe).
- Type “vol” and hit Enter.
- Copy the 8-digit alphanumeric Disk Volume Serial Number into the “Message” field of Request for ESRD Support. Complete the form and Submit.
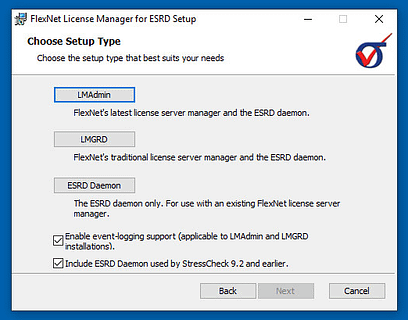
ESRD uses the FlexNet v11.19.5 license manager from Revenera. Options are available for LMGRD (traditional with LMTools.exe), LMAdmin or ESRD Daemons Only:
- If you have not installed the FlexNet v11.19.5 license manager, you may download it from the ESRD Resource Library. Then, follow these instructions to install FlexNet v11.19.5 on your license server.
- If you are already using FlexNet v11.19.5 or above to manage licenses for other applications, you may simply append the license keys provided by ESRD into your standard FlexNet license file (usually license.dat) and re-read in LMTools (if LMGRD) or via the LMAdmin Interface. Alternatively, you may maintain separate license files for each application.
For additional details concerning license serving options, consult the FlexNet v11.19.5 documentation or visit our Software FAQs page.
If running StressCheck or another ESRD product for the first time (or after having removed all StressCheck licensing references), you will be prompted with the ‘Specify StressCheck License Path’ dialogue.
PORT@SERVERNAME
Where ‘PORT’ is the port used for communication (default is 29731), and ‘SERVERNAME’ is the name of the license server set up by your system administrator to serve licenses for StressCheck. Then, click OK. StressCheck should start once the dialogue steps are complete.
For more details on specifying a license, refer to How Do I Point to a New License File or Server? and How Do I Specify My ESRD Software Product License File Or License Server.
Having Trouble Installing StressCheck or another ESRD Product?
If you are unable to run StressCheck, or another ESRD product, successfully after installing a new license file, visit our Software FAQs page and review the FAQ’s. If you need assistance please contact ESRD Support.
Looking for Resources?
Recent News & Events
Quick Links
Testimonials
-
“Hearty congratulations to management and staff at ESRD on their 25th anniversary. The quality and capability of their software products are excellent. I hope that ESRD successfully continues for many more years with the fundamental principles of mathematical precision, numerical accuracy, and integrity in computational simulation.”
Dr. William Oberkampf
Author of Verification and Validation in Scientific Computing
 Serving the Numerical Simulation community since 1989


